Easy Origami: Step-by-Step Straw Weaving Paper Craft
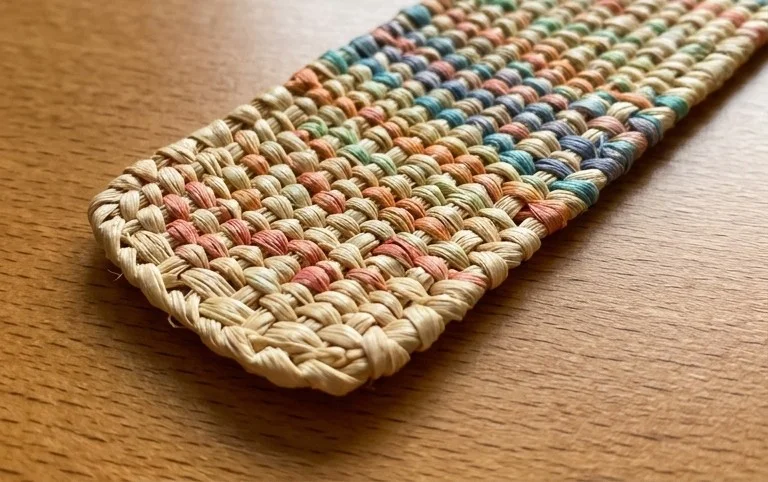
Straw Weaving opens up a wonderfully simple yet surprisingly intricate world of paper art, right from your drinking straws! Today, we’re going to dive into creating a beautiful woven pattern that looks like a tiny, colourful mat or a vibrant tapestry. It’s perfect for complete beginners and fantastic fun for kids, making it an ideal project for a quick creative session, perhaps taking just 15-30 minutes. Imagine crafting charming little decorations, unique gift tags, or even building up a collection to frame. In this tutorial, I’ll guide you step-by-step through the basic weaving technique, showing you how to prepare your straws and interlace them with paper strips to create these delightful woven pieces. Get ready to transform everyday straws into something special – let’s get weaving!
Straw Weaving: A Beginner-Friendly Origami Technique
Welcome to the wonderful world of straw weaving in origami! This is a fantastic technique that allows you to create intricate and beautiful woven patterns using simple drinking straws and paper. It’s surprisingly accessible, even for those who are brand new to origami, and the results are incredibly rewarding. Today, we’re going to walk through the process step-by-step, ensuring you’ll be able to create your own stunning woven pieces.
Choosing Your Paper: The Foundation of Your Weaving
The paper you choose is crucial for successful straw weaving. It directly impacts the ease of folding, the crispness of your creases, and the final appearance of your model.
For beginners, I highly recommend using standard origami paper. This paper is specifically designed for folding and has a good balance of strength and flexibility. It’s typically around 80 gsm (grams per square meter), which is a good weight – not too thick to make sharp creases difficult, and not too thin to tear easily.
When it comes to size, you can start with standard origami paper sizes like 15cm x 15cm (6 inches x 6 inches). This size is manageable and allows you to get a feel for the folds without being overwhelmed. As you gain confidence, you can experiment with larger or smaller squares.
The question of single-sided versus double-sided paper is also important. For straw weaving, single-sided paper is often preferred. This is because the weaving process naturally reveals the inside of the paper, and you’ll often see a pleasing contrast between the coloured side and the white side. If you use double-sided paper where both sides are the same colour, it will still look great, but you won’t get that characteristic two-toned woven effect. If you use double-sided paper with different colours on each side, you’ll get an even more complex and vibrant woven look!
The Essential Base Folds: Crisp Creases are Key
Before we start weaving, we need to master a couple of fundamental folds. The beauty of straw weaving lies in its precision, and clean, sharp creases are the secret to achieving that.
First, let’s talk about the “valley fold.” This is when you fold a piece of paper so that the crease forms a “V” shape, like a valley. To make a clean valley fold, align the edges or corners precisely. Then, run your finger or a bone folder along the crease firmly, from one end to the other. It’s like pressing down a zipper; you want to make sure it’s sealed all the way.
Next is the “mountain fold.” This is the opposite of a valley fold; the crease forms an inverted “V,” like a mountain peak. When you make a mountain fold, you’re essentially folding the paper *away* from you. The technique for making a crisp mountain fold is the same: precise alignment followed by a firm, smooth press along the fold line.
It’s also really important to *unfold* your paper after making these initial creases. These unfolded creases will serve as guides for our subsequent steps. Think of them as invisible lines that will tell you where to fold next.
The Fold Sequence: Let’s Start Weaving!
Now that we’ve got our paper and our folding skills ready, let’s get into the actual straw weaving process. We’ll be making a simple woven square, a great starting point for this technique.
Start with your square of origami paper. For this explanation, let’s assume you’re using single-sided paper with the coloured side facing up.
1. Begin by making a “valley fold” right down the middle of the paper, bringing the bottom edge up to meet the top edge precisely. Crease firmly. Unfold the paper. You should now have a horizontal crease across the centre.
2. Next, make another “valley fold” down the middle, this time bringing the left edge to meet the right edge precisely. Crease firmly. Unfold the paper. You should now have a vertical crease down the centre, intersecting the horizontal one at a perfect cross. Your paper is now divided into four equal quadrants.
3. Take the bottom edge of the paper and fold it up to meet the central horizontal crease. Crease firmly. This is a valley fold.
4. Now, take the top edge of the paper and fold it down to meet the central horizontal crease. Crease firmly. This is also a valley fold. You should now have a rectangle in the centre of your paper, with two flaps folded inwards on the top and bottom.
5. Turn the paper over so the white side is facing up.
6. Take the bottom edge of the paper (which is now the bottom edge of the rectangle you’ve created) and fold it up to meet the top edge of that same central rectangle. Crease firmly. This is a valley fold.
7. Take the top edge of the paper (which is now the top edge of the central rectangle) and fold it down to meet the bottom edge of that central rectangle. Crease firmly. This is also a valley fold. You should now have a smaller, more compact rectangle in the centre.
8. Now, we’re going to create the “straws.” Unfold the last two folds you made (steps 6 and 7). This will reveal the central rectangle again, but you’ll have two new horizontal creases within it.
9. Carefully fold the bottom edge of your paper up to meet the first horizontal crease you made in step 3. Crease firmly. This is a valley fold.
10. Carefully fold the top edge of your paper down to meet the second horizontal crease you made in step 4. Crease firmly. This is a valley fold. You should now have your paper folded into three horizontal sections, with the middle section being the original central rectangle.
11. Unfold your paper completely. You should now see a grid of creases on your paper.
12. Let’s make the “straws” visible. Take the bottom edge of your paper and fold it up to meet the first horizontal crease *above* the central horizontal crease. Crease firmly. This is a valley fold.
13. Take the top edge of your paper and fold it down to meet the first horizontal crease *below* the central horizontal crease. Crease firmly. This is a valley fold. You now have what looks like a wide band in the middle of your paper.
14. Now, let’s turn our attention to the vertical creases. Take the left edge of the paper and fold it inwards to meet the central vertical crease. Crease firmly. This is a valley fold.
15. Take the right edge of the paper and fold it inwards to meet the central vertical crease. Crease firmly. This is a valley fold. You should now have a long, narrow rectangle in the centre.
16. Unfold the last two folds you made (steps 14 and 15). This will reveal the central vertical crease, and you’ll have two new vertical creases within the central band.
17. Now, let’s create the woven effect. Imagine the central band is divided into vertical strips by the creases we just made. We need to lift alternating strips. Take the leftmost vertical strip (the one furthest to the left within the central band) and carefully lift it up. You’re essentially creating a slight bulge.
18. Now, take the *next* vertical strip to the right and fold it *down* over the lifted strip. This is the start of the weave.
19. Continue this process: lift the next vertical strip, then fold the one after it down over it. You’ll be alternating between lifting a strip and folding a strip down. This is where the “weaving” happens.
20. As you work your way across, you’ll be tucking the folded-down strips underneath the lifted strips. You should aim to create a consistent, flat weave. This might take a little practice.
21. Once you’ve woven all the vertical strips across, you’ll have a beautiful woven pattern in the centre of your paper. You can then either trim the excess paper on the sides or fold it neatly behind.
Common Pitfalls and How to Avoid Them
Even with clear instructions, there are a few places where beginners can sometimes get a little stuck. Don’t worry if you encounter these; they’re part of the learning process!
* **Imprecise Folds:** This is the number one culprit for less-than-perfect results. If your initial folds aren’t aligned perfectly, your subsequent folds will also be off.
* *How to Avoid:* Take your time with each fold. Look at the paper from different angles to ensure edges and corners are precisely aligned before you crease. Use a fingernail or a bone folder to make your creases as sharp and flat as possible. Think of it like building with Lego – precise connections make for a stable structure.
* **Forcing the Paper:** Sometimes, when you’re trying to tuck one strip under another, the paper might resist or feel like it’s going to tear.
* *How to Avoid:* This usually means the creases you made previously aren’t quite sharp enough, or you’re trying to force it without properly aligning. Gently ease the paper. If it’s not going smoothly, re-examine your previous folds. Ensure the “lifted” strips have enough “give” for the other strips to pass underneath. Sometimes, slightly loosening a previous crease can help.
* **Uneven Weaving:** The woven pattern might look a bit haphazard, with some strips tighter than others.
* *How to Avoid:* This comes back to precision. As you’re weaving, try to maintain a consistent tension. Don’t pull too tightly on one strip and leave another loose. Aim for an even distribution of the paper. You might need to gently adjust the tucked strips after you’ve woven them all across to even things out.
Varying Your Creations: Endless Possibilities!
Once you’ve mastered the basic straw weave, you’ll find that the possibilities for variation are enormous!
* **Size:** Simply start with a larger or smaller square of paper. Remember that with larger paper, you’ll need to make sure your creases are even more precise, as any small error will be magnified. With smaller paper, you’ll need nimble fingers and perhaps tweezers for easier manipulation.
* **Paper Pattern and Colour:** This is where you can really let your creativity shine!
* **Patterned Paper:** Use origami paper with beautiful patterns. These can create truly unique woven effects. Think floral patterns, geometric designs, or even textured papers.
* **Colour Combinations:** Experiment with different coloured papers. Using a bright, contrasting colour for the “weft” (the strips that go over) and a more subtle colour for the “warp” (the strips that go under) can create a striking effect. Alternatively, use two colours that complement each other for a more harmonious look.
* **Double-Sided Paper:** As mentioned earlier, using paper with different colours on each side can lead to a wonderfully complex and multi-dimensional woven look as different coloured edges become visible.
Displaying and Gifting Your Woven Masterpieces
Your finished straw woven pieces are more than just folded paper; they’re miniature works of art!
* **Framing:** A simple origami straw weave looks stunning when framed. You can mount it on a contrasting coloured cardstock and place it in a shadow box frame to give it depth. This makes a beautiful piece of wall art.
* **Cards and Gift Tags:** Smaller woven pieces can be glued onto handmade cards or used as unique gift tags. They add a personal and handmade touch that recipients will cherish.
* **Coasters:** If you use a slightly thicker, more robust paper, you can create coasters. To make them more durable, you could consider sealing them with a clear sealant or a Mod Podge.
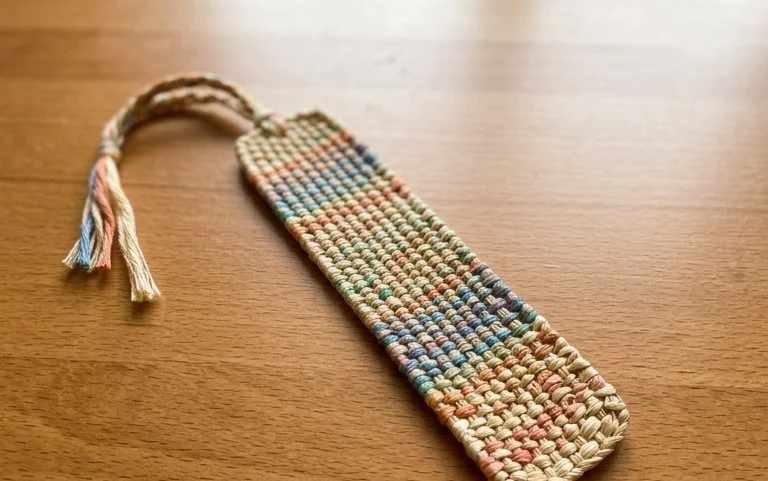
* **Bookmarks:** A long, narrow straw weave can make a beautiful and sturdy bookmark.
* **Decorations:** String a few together to make a garland, or use them as embellishments on other craft projects. They can add a touch of elegance and handmade charm to any occasion.
I hope you’ve enjoyed this journey into straw weaving. It’s a technique that’s both meditative and incredibly satisfying. With a little practice and a willingness to experiment, you’ll be creating beautiful woven origami in no time! Happy folding!
Conclusion
Congratulations on completing your first straw weaving project! This unique origami technique is incredibly satisfying, and we hope you enjoyed weaving on drinking straws. Don’t be discouraged if your first attempt isn’t perfect – every fold is a learning experience, and practice truly makes perfect. Once you’ve finished your model, we’d love for you to share your beautiful creation with friends and family!
For your next adventure, why not try a larger weave using more straws, or experiment with different colored straws to create vibrant patterns? There are so many possibilities to explore within this fascinating craft. We encourage you to keep creating and discover the joy of paper crafting with many more exciting projects to come!