Easy Origami Woodland Animals Bookmarks DIY
DIY woodland animals origami bookmarks are a delightful way to bring a touch of nature to your reading adventures! Imagine adorable little foxes peeking out from your pages, mischievous squirrels ready to greet you, or a wise owl keeping your place. These charming little creatures are surprisingly simple to create, making them perfect for complete beginners, fun craft sessions with kids, or even thoughtful handmade gifts.
In this tutorial, I’ll guide you step-by-step, with easy-to-print templates, through folding these sweet woodland friends. You’ll learn basic origami folds and discover how to bring these characters to life with just paper. We’ll spend about 15-30 minutes per animal, depending on your pace, and the result will be a collection of unique bookmarks that will add a pop of personality to any book. Let’s get folding!
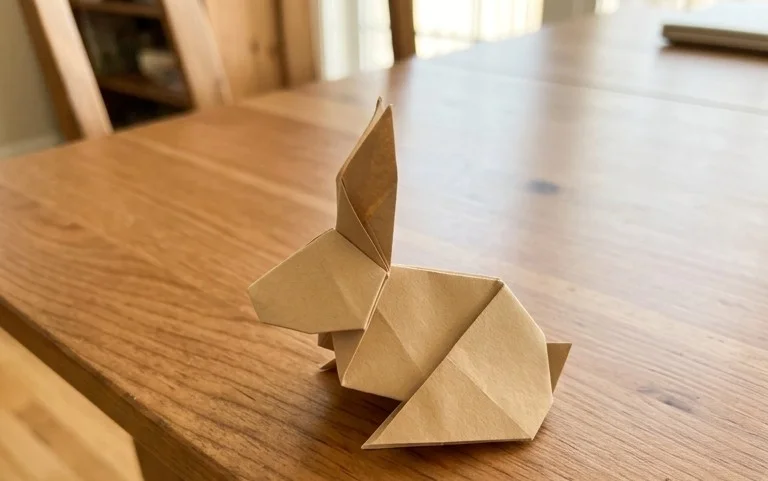
Let’s get crafting! Today, we’re diving into the delightful world of origami to create some adorable woodland animal bookmarks. These are perfect for adding a touch of magic to your reading nook, or for making thoughtful, handmade gifts. We’re going to focus on the “print and fold” method, meaning you’ll be able to print out simple templates to guide your folds. This is a fantastic way for beginners to get started with origami, as it provides clear lines to follow. Get ready to transform a simple piece of paper into a charming fox, a wise owl, or a playful bear!
Choosing Your Paper: The Foundation of Your Origami
The paper you choose is more important than you might think when it comes to origami. It affects how crisp your folds are, how well the paper holds its shape, and the overall look of your finished bookmark. For these woodland animal bookmarks, I recommend a few different options, depending on your preference and what’s easily available.
First, let’s talk about the type of paper. Standard printer paper (often called copy paper) works perfectly well, especially for practicing. It’s readily available and a good weight to start with. If you want something a bit more special, consider origami paper. Origami paper is thinner and stronger than regular printer paper, making it easier to achieve sharp folds and preventing it from tearing easily, even with multiple layers. It also comes in a fantastic array of colours and patterns, which we’ll get to later!
Now, for the weight. For beginner-friendly bookmarks, aim for a paper weight between 70 gsm and 90 gsm. If you’re using US letter or A4 paper from your printer, it’s likely around 75-80 gsm, which is ideal. Avoid cardstock or very thick paper, as it can be difficult to fold precisely and will make your bookmarks bulky.
The size of your paper will depend on the template you’re using. Most printable templates are designed for standard A4 or US Letter size paper. This makes it incredibly convenient – you just print and go! The templates will usually be designed to create a bookmark of a good, functional size.
When it comes to whether your paper is single or double-sided, this is where the “print and fold” aspect really shines. You’ll be printing a template onto one side of the paper. This template will likely include the outline of the animal’s face, ears, and perhaps some decorative elements. The back of the paper will remain blank. This is perfectly fine and often desired, as it gives you a clean canvas for the animal’s features. If you happen to have double-sided patterned paper, you could try printing the template onto the plain side, so the pattern shows through on the back, adding an extra layer of visual interest.
Mastering the Base Folds: Your Origami Building Blocks
Before we get to the specific animal folds, let’s ensure you’re comfortable with the fundamental folds. These are the building blocks of almost all origami, and practicing them will make the rest of the process much smoother.
The two most important folds for these bookmarks are the valley fold and the mountain fold.
The Valley Fold
Imagine you’re folding a piece of paper in half to create a crease that looks like a valley. You bring two edges or corners together and press down firmly along the fold line. The paper will bend inwards. When you look at the crease from the side, it dips down.
The Mountain Fold
This is the opposite of a valley fold. Instead of the paper bending inwards, it bends outwards, creating a crease that looks like the peak of a mountain. To make a mountain fold, you typically fold the paper away from you, so the crease pops up. Often, you’ll make a valley fold first, and then unfold the paper and make a mountain fold along the same crease, pushing the paper up.
How to make them cleanly: The key to clean folds is precision and firm pressure.
* Line up your edges and corners as accurately as possible before making the crease. Even a tiny misalignment can affect subsequent folds.
* Use your fingernail or a bone folder (if you have one) to run along the fold line. This creates a sharp, defined crease that will hold its shape.
* Don’t rush! Take your time with each fold.
Step-by-Step Origami Bookmark Creation: A Beginner’s Journey
Now, let’s get folding! Remember, we’re using printable templates, so you’ll have a guide to follow. I’ll describe the folds in plain language, assuming you’re looking at the paper with the printed template facing you.
Let’s imagine we’re making a simple fox bookmark as our first example.
1. **Prepare your template:** Print your chosen woodland animal template onto your paper. Make sure the printed image is facing up.
2. **Initial Fold:** Take the bottom edge of the paper and bring it up to meet the top edge. Make sure the corners align perfectly. Press down firmly to create a horizontal valley fold. You now have a rectangle that is half the original height.
3. **Second Fold:** Take the right edge of the folded paper and bring it over to meet the left edge. Again, align the corners precisely. Press down firmly to create a vertical valley fold. You now have a square, with the folded edges on the left and top.
4. **Opening to a Triangle:** With the folded edges on the left and top, open the paper up from the second fold you just made. You should see a vertical crease down the middle. Now, take the bottom corner (the one that’s a single point) and bring it up to meet the top corner (where all the folds meet). Align these corners perfectly. Press down firmly to create a diagonal valley fold. You now have a triangle.
5. **Forming the Bookmark Base:** Orient the triangle so the long, folded edge is at the bottom and the point is at the top. Now, take the right corner of the triangle (the one along the bottom edge) and bring it up towards the top point. You want to bring it up so that the raw edge of this corner aligns with the center line of the triangle. Don’t bring it all the way to the top point; aim for a fold that creates a new, angled edge. Press firmly.
6. **Repeat on the Other Side:** Do the exact same thing with the left corner of the triangle. Bring it up so its raw edge aligns with the center line, mirroring the fold you just made on the right. You should now have a shape that looks a bit like a diamond with two flaps on top.
7. **Creating the Pocket:** Look at the two flaps you’ve just created. Fold the front flap (the one on the right) downwards. You want to fold it so that the tip of this flap tucks *underneath* the flap on the left. This creates the pocket where your bookmark will hold onto the page. Press this fold down firmly.
8. **Finishing Touches (for the fox):** If your template has ear shapes on the top, these will naturally form as part of the previous folds. You might have small triangular points sticking up. Gently fold these points down a little to create the fox’s ears. If your template has eyes, a nose, or cheeks printed on it, you can either leave them as is or use a fine-tipped marker to add more detail.
This sequence of folds – the initial rectangle, then the square, opening to a triangle, and then folding the corners up to form the pocket – is a very common origami base called the “waterbomb base” or a variation of it, and it’s the foundation for many of these animal bookmarks.
Common Beginner Pitfalls and How to Avoid Them
It’s completely normal to encounter a few hiccups when you’re starting out. Here are some of the most common places beginners go wrong with these origami bookmarks and how to steer clear of them:
1. Imprecise Corner and Edge Alignment
* **The Problem:** You bring two edges together, but they don’t quite match, or corners are slightly off. This leads to skewed folds and a lopsided final product.
* **How to Avoid It:** Be patient! Before you make any crease, take a moment to ensure your corners are perfectly aligned and your edges are sitting flush. Gently adjust the paper until everything lines up. Press your creases firmly and accurately. Think of it as building with LEGOs – if the first piece isn’t placed perfectly, the whole structure can be wobbly.
2. Soft, Messy Folds
* **The Problem:** Your creases aren’t sharp. The paper looks a bit rumpled, and the folds don’t hold their shape well.
* **How to Avoid It:** This comes down to applying firm pressure. Once you’ve aligned your paper for a fold, use your fingernail to run along the entire length of the crease. You can even use the side of a ruler or a bone folder if you have one. This will make your folds crisp and defined, giving your origami a much more professional look and making subsequent folds easier to execute.
3. Forgetting the Direction of the Fold
* **The Problem:** You’re trying to make a valley fold, but the paper is bending outwards like a mountain, or vice versa.
* **How to Avoid It:** Pay close attention to the language of the instructions. When I say “bring the bottom edge to meet the top edge,” visualize that action. The paper should bend inwards to form the “valley.” If you’re unsure, do a practice fold on scrap paper. Also, notice how the paper is oriented. If you have a printed template, the printed side is usually facing you, and you’ll be folding *towards* yourself for most valley folds and *away* from yourself for mountain folds (though with these bookmarks, most folds are valley folds).
Making it Your Own: Variations and Customization
Once you’ve mastered the basic folds for one animal, the fun really begins with customization!
* **Varying the Size:** Most printable templates are designed for standard paper. If you want smaller bookmarks, you can print the template at a reduced scale (e.g., 75% or 50%). Conversely, for larger bookmarks, you could print at 125% or 150%. Just be aware that very small folds can be tricky, and very large folds might become a bit unwieldy.
* **Paper Patterns:** This is where you can get really creative!
* **Themed Paper:** Look for patterned paper with subtle woodland motifs like leaves, acorns, or twigs.
* **Colour Gradients:** Paper that fades from one colour to another can create beautiful effects, making your animal look like it’s emerging from a sunset or a forest mist.
* **Geometric Patterns:** Even simple geometric patterns can look fantastic and add a modern twist to your origami.
* **Plain Coloured Paper:** Don’t underestimate the power of solid colours! A beautiful deep brown for a bear, a fiery orange for a fox, or a muted grey for an owl can be incredibly effective.
* **Colour and Detail:**
* **Print in Black and White:** If you’re using plain coloured paper, you can print the template in black and white. This gives you a clean outline to colour in yourself. Use coloured pencils, markers, or even watercolours to bring your animals to life.
* **Add Extra Details:** After folding, use fine-tipped markers to add extra personality. Tiny white dots for shining eyes, little rosy cheeks, or even a few whiskers can make a big difference. You could also use a hole punch to create small circles for eyes or decorative elements.
Displaying and Gifting Your Creations
These origami bookmarks aren’t just functional; they’re little pieces of art!
* **For Your Own Books:** Simply slide your finished bookmark onto the top edge of your current page. The folded pocket will grip the page securely. They look especially charming peeking out of a beloved novel.
* **As Gifts:** These make wonderful, personal gifts for:
* **Book Lovers:** Of course! Pair one with a new book for a truly thoughtful present.
* **Students:** Help them keep their place in textbooks or for creative writing assignments.
* **Children:** They’re a fun and engaging way to encourage reading.
* **Crafty Friends:** Share the joy by gifting them the template and some beautiful paper.
* **In Gift Packaging:**
* **Attach to a Card:** You can glue or tape your bookmark onto a handmade card.
* **Tie with Ribbon:** Punch a small hole in the top of the bookmark and tie a colourful ribbon through it. This also allows you to hang them as decorations.
* **In a Small Gift Box:** Place a few bookmarks in a small, decorated box for a charming surprise.
I hope you have a wonderful time creating your own origami woodland animal bookmarks. Don’t be discouraged if your first few attempts aren’t perfect; every fold is practice, and soon you’ll be creating a whole menagerie of charming little readers! Happy folding!
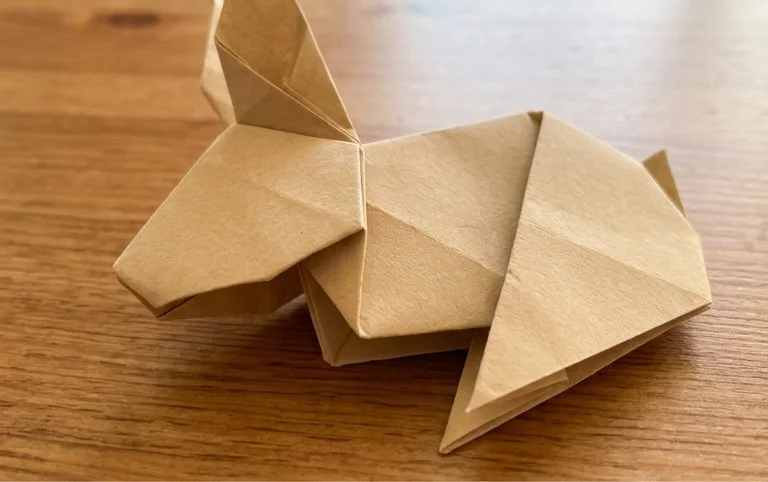
Conclusion
Congratulations on completing your DIY woodland animals origami bookmarks! We hope you had a wonderful time folding these charming little creatures. Don’t worry if your first attempt isn’t perfect – origami is all about practice, and every fold brings you closer to mastery. Show off your adorable new bookmarks by sharing them with friends or family. For your next origami adventure, why not try creating a delicate butterfly or a playful dog? There are so many more exciting paper projects waiting for you to discover!