Easy Origami Paper Crafts & Characters for Kids
Origami Paper Characters & Crafts for Kids are a fantastic way to spark imagination and get little hands busy! Today, we’re diving into the delightful world of folding paper into adorable characters and useful crafts that kids will absolutely love. Imagine your child’s face lighting up as they transform a simple square of paper into a jumping frog, a flapping bird, or even a cute little box to hold their treasures. This tutorial is perfect for complete beginners and young crafters, making it an ideal activity for a rainy afternoon or a fun party craft. We’ll have you creating these charming pieces in about 10-20 minutes each. You’ll learn basic origami folds, discover how to follow simple diagrams, and unleash your creativity with these easy and rewarding projects. Let’s get folding and make some magic with paper!
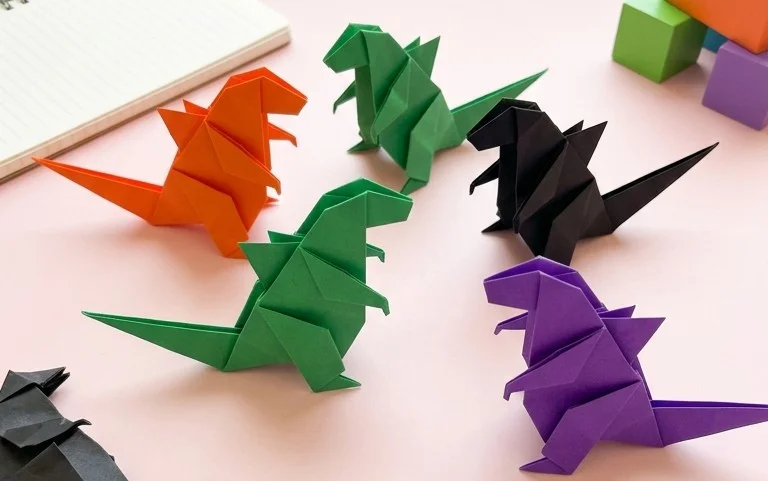
Welcome to Crafts Hive, where we’ll be diving into the magical world of origami! Today, we’re going to create some delightful paper characters and crafts perfect for little hands and budding artists. Origami is not only fun but also a fantastic way to develop fine motor skills, spatial reasoning, and patience. So, grab your paper, and let’s get folding!
Choosing Your Origami Paper: The Foundation of Your Creation
The paper you choose is incredibly important in origami. For beginners, especially when making characters for kids, I recommend starting with specific types of paper to ensure your creations are both sturdy and beautiful.
Type and Weight:
For this project, I suggest using standard origami paper. This paper is designed to hold creases well and is usually thin enough to fold multiple times without becoming too bulky. You can find it at most craft stores or online. If you can’t get dedicated origami paper, standard printer paper can work in a pinch, but it will be thicker and might be a bit more challenging for very intricate folds. For a sturdier character that can withstand enthusiastic handling, you might opt for paper with a slightly higher weight, perhaps around 70-90 gsm (grams per square meter). However, for most kids’ crafts, the typical 60-70 gsm origami paper is perfect.
Size Matters:
Origami paper typically comes in squares. For children, I find that larger squares, such as 6-inch (15cm) or even 8-inch (20cm) squares, are easier to handle. Smaller squares can be frustrating for beginners, as the folds become very precise and tiny. Starting with a larger size will build confidence and make the folding process more enjoyable.
Single-Sided vs. Double-Sided:
Origami paper often comes in two varieties: single-sided and double-sided. Single-sided paper has a coloured side and a white side. This is fantastic for creating models where you want a pop of colour on the outside, while the inside can remain white. Double-sided paper has colour on both sides, which can be nice if you want your finished model to be colourful all over or if you’re making something that will be viewed from all angles. For our character crafts, either works wonderfully! If you’re going for a specific look, consider the colour scheme you want for your character.
Mastering the Base Folds: The Building Blocks of Origami
Before we jump into our character, let’s get familiar with a couple of essential origami folds. Practicing these will make the rest of the process much smoother.
The Valley Fold:
Imagine you have a piece of paper in front of you. A valley fold is like folding a mountain in half, creating a V-shape, or a valley. To make a valley fold, bring one edge of the paper to meet another edge, or a corner to meet another corner. Then, press down firmly along the crease you’ve created. You can use your fingernail to make it really sharp and clean. We’ll be making many valley folds today!
The Mountain Fold:
A mountain fold is the opposite of a valley fold. Instead of folding the paper inward to form a V, you fold it outward to form an inverted V, like the peak of a mountain. Often, you’ll make a valley fold first, and then unfold the paper. To turn that valley fold into a mountain fold, you simply reverse the direction of the crease. The paper will now fold away from you along that line. We’ll be using both valley and mountain folds to give our characters dimension.
Making Clean Folds:
The secret to beautiful origami is crisp, clean folds. Here’s how to achieve them:
* **Alignment is Key:** Always take your time to line up edges and corners precisely. A slight misalignment at the beginning can lead to significant issues later on.
* **Sharp Creases:** Once you’ve aligned your paper, press down firmly along the fold line. Run your fingernail or a bone folder (if you have one) along the crease to make it sharp.
* **Unfold and Refold (if needed):** If a fold isn’t quite right, don’t be afraid to unfold it and try again. It’s better to fix a mistake early than let it compound.
Let’s Fold a Character: The Simple Origami Dog!
This is a super fun and easy origami project, perfect for a first character! We’ll be making a cute dog face.
Numbered Fold Sequence:
1. Start with your square piece of origami paper, coloured side down if you are using single-sided paper.
2. Fold the paper in half diagonally to form a triangle. Bring the bottom-left corner up to meet the top-right corner. Press the crease firmly. You should now have a triangle with the point facing upwards.
3. Now, we’re going to make the dog’s ears. Take the right corner of the triangle (which is one of the two points at the bottom of the triangle) and fold it down and outwards, at an angle. This fold should start from the top point of the triangle and extend downwards, creating a floppy ear shape. Repeat this on the left side with the other bottom corner, making sure the ears are roughly symmetrical.
4. Next, we’ll make the snout. Take the very bottom point of the triangle (the single point at the bottom) and fold it upwards. You don’t need to fold it all the way to the top point; just fold it up a small amount to create the dog’s nose and snout. Press this crease firmly.
5. Flip your origami piece over. You should now see the dog’s face with its ears and snout.
6. Now for the fun part – decorating! You can use pens or markers to draw eyes, a nose on the folded-up snout, and maybe even some whiskers.
Common Beginner Mistakes and How to Avoid Them:
* **Mistake 1: Sloppy Diagonal Folds.** If your initial diagonal fold isn’t a perfect triangle, your ears might end up lopsided or your snout won’t align properly.
* **Avoidance:** Take your time to line up the two opposite corners perfectly before making the crease. Ensure the entire edge from corner to corner meets precisely.
* **Mistake 2: Uneven Ears.** When folding down the ears, it’s easy to make one flap longer or at a different angle than the other.
* **Avoidance:** After making the first ear fold, look at it and then try to mirror that fold exactly on the other side. It’s okay if they aren’t absolutely identical, but aim for a close resemblance.
* **Mistake 3: Forgetting to Flip Over for Decoration.** Some beginners might try to draw on the back of the paper where the folds are less defined.
* **Avoidance:** Remember to flip your model over after folding the snout. The smooth, front side is where your dog’s face will truly come to life with decorations.
Let’s Fold Another Character: The Easy Origami Cat!
Here’s another simple and adorable character that’s great for beginners.
Numbered Fold Sequence:
1. Start with your square piece of origami paper, coloured side up this time.
2. Fold the paper in half diagonally to form a triangle, bringing the bottom-left corner up to meet the top-right corner. Press the crease firmly. The point of the triangle should be facing upwards.
3. We’re going to make the cat’s ears. Take the right corner of the triangle (one of the two points at the bottom) and fold it upwards at an angle. This fold should not go all the way to the top point, but rather create a pointed ear shape sticking out from the side of the triangle.
4. Repeat the same fold on the left side with the other bottom corner, aiming to make the ears symmetrical.
5. Now, we’ll make the cat’s chin. Take the very bottom point of the triangle and fold it upwards a small amount. This creates the bottom of the cat’s face.
6. Flip your origami piece over. This is the front of your cat’s face!
7. Decorate your cat! Use pens to draw two eyes, a nose, a mouth, and whiskers. You can also draw little details on the ears.
Common Beginner Mistakes and How to Avoid Them:
* **Mistake 1: Ears Folded Too Flat.** If you fold the ears down too much or too flat, they might look more like wings than ears.
* **Avoidance:** Experiment with the angle before making the final crease. You want the ears to point upwards and outwards from the main triangular shape.
* **Mistake 2: Uneven Chin Fold.** Folding the chin up too high or too low can make the face look a bit strange.
* **Avoidance:** A small fold is usually best, just enough to round off the bottom of the face. Aim for about 1-2 cm (half an inch) from the bottom point upwards.
* **Mistake 3: Overlapping Ear Folds.** If the ear folds are too close to the centre point, they might overlap awkwardly.
* **Avoidance:** Ensure the folds for the ears start a little way in from the central vertical line of the triangle, allowing them to stick out more clearly.
Varying Your Origami Creations: Endless Possibilities!
Once you’ve mastered these basic characters, the fun truly begins with how you can customize them!
Size Variations:
As mentioned earlier, starting with larger paper (8-inch squares) is great for beginners. However, once you’re comfortable, try using smaller squares (like 3-inch or 4-inch). These make wonderful little decorations or can be used to create a whole collection of tiny friends. You can also use larger paper for a more impressive display piece.
Paper Patterns and Colours:
This is where your creativity can really shine!
* **Patterned Paper:** Use patterned origami paper for truly unique characters. Floral patterns can make charming cats, while geometric patterns might be great for a more abstract dog. Even wrapping paper can be used, provided it’s not too thick.
* **Solid Colours:** Don’t underestimate the power of solid colours! A bright red cat, a blue dog, or even a green character can be incredibly eye-catching. Think about the personality you want to give your character.
* **Combining Papers:** You can even try layering different coloured papers or using double-sided paper to create interesting effects. For example, you could use a patterned paper for the main face and a solid colour for the ears.
Displaying and Gifting Your Origami Creations: Sharing the Joy
Your finished origami characters are more than just folded paper; they’re little works of art!
Display Ideas:
* **Desk Buddies:** These little characters make fantastic desk companions, bringing a smile to your face while you work or study.
* **Mobile:** String several characters together to create a charming origami mobile. Hang them from a craft hoop or a branch for a whimsical decoration.
* **Garland:** Punch a small hole at the top of each character and thread them onto a string to create a festive origami garland. Perfect for parties or to liven up a bookshelf.
* **Diorama:** Create a small scene or diorama where your origami characters can live. Use a shoebox or a small display case and add elements like drawn backgrounds or small craft items.
Gifting Ideas:
* **Party Favours:** Origami characters are fantastic, inexpensive party favours that guests of all ages will love.
* **Handmade Cards:** Glue a small origami character onto a handmade card to add a special, personal touch.
* **Gift Toppers:** Instead of a traditional bow, tie a ribbon around a gift and attach a cute origami character.
* **Small Gifts for Friends:** A handmade origami friend is a thoughtful and cheerful gift for a classmate, a neighbour, or anyone who needs a little bit of cheer.
I hope you’ve enjoyed this origami adventure! Remember, the most important thing is to have fun and be patient with yourself. Every fold you make is a step towards becoming a more confident origami artist. Happy folding from Crafts Hive!
Conclusion
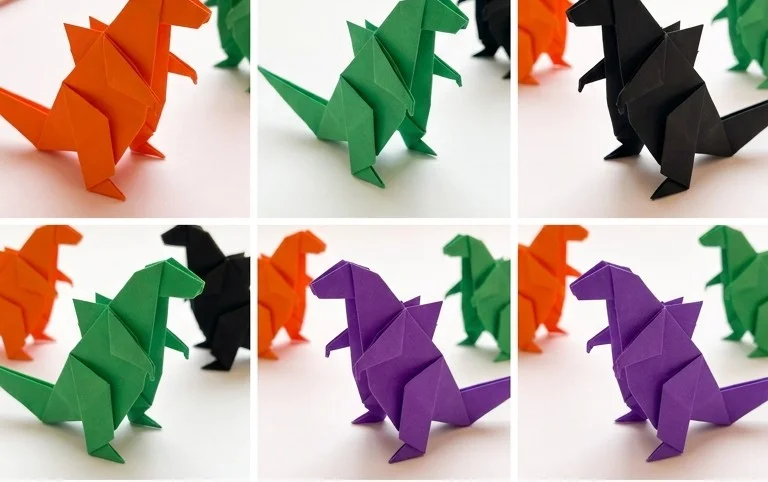
Congratulations on folding your very own origami paper characters! Don’t worry if your first attempt isn’t perfect; every fold is a step in learning, and practice makes progress. We encourage you to keep folding and enjoy the process. Share your wonderful creations with friends and family – they’ll be amazed! For your next adventure, try folding a classic origami crane or a playful origami dog. There are so many more exciting paper projects waiting for you to discover here at Crafts Hive, so dive in and let your creativity soar!
