Easy Green Twisted Paper Ribbon Origami: Step-by-Step
Twisted Paper Ribbon in Green is a delightful and surprisingly simple origami creation that brings a touch of organic elegance to your paper crafting. Imagine a vibrant green ribbon, not flat and smooth, but with gentle, pleasing twists that catch the light and give it a dynamic, almost alive feel. It’s a perfect project for complete beginners and kids alike, and it takes just about 5-10 minutes to fold! I love making these for little gifts, or just to add a pop of color to my desk or a handmade card. In this tutorial, I’ll guide you step-by-step through the easy folds and twists needed to create your very own beautiful green ribbon. Get your paper ready, and let’s have some fun folding!
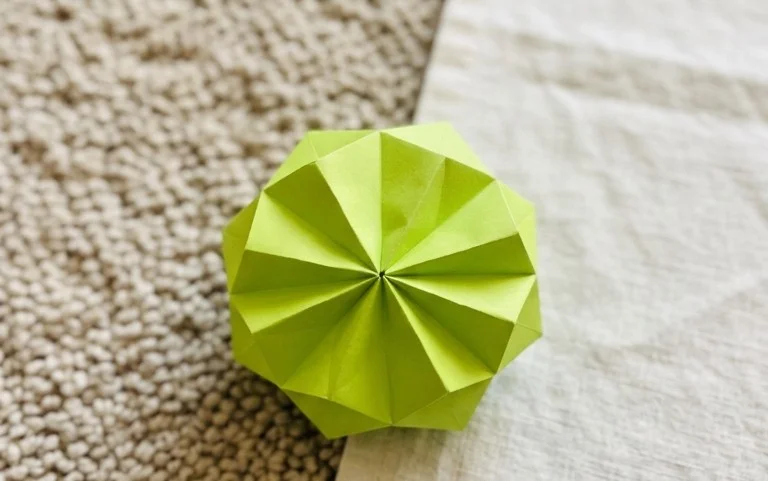
Crafting a Vibrant Green Twisted Paper Ribbon
Hello there, fellow paper enthusiasts! Today, we’re embarking on a delightful origami journey to create a beautiful twisted paper ribbon in a lovely shade of green. This project is wonderfully versatile and surprisingly simple once you get the hang of it. I find it adds a touch of elegance to gifts, decorations, or even just as a standalone decorative piece. It’s a fantastic way to practice some fundamental origami folds, so let’s dive in!
Choosing Your Perfect Green Paper
The paper you choose is fundamental to the success and aesthetic of your twisted ribbon. For this project, I highly recommend using standard origami paper.
* **Type:** Origami paper is ideal because it’s thin enough to allow for crisp folds without becoming bulky, yet strong enough to hold its shape. It’s also typically colored on one side and white on the other, which is perfect for this model as the white will be hidden. If you have paper that’s colored on both sides, that’s perfectly fine too! It will just mean the “wrong” side of the ribbon will also have color, which can be a nice effect.
* **Weight:** Standard origami paper is usually around 70-80 gsm (grams per square meter). This weight is perfect. Avoid cardstock or very thick paper, as it will make the twisting action difficult and the final ribbon will be too stiff and chunky.
* **Size:** A good starting point for this ribbon is a square piece of paper, typically 6 inches by 6 inches (15 cm by 15 cm). You can absolutely experiment with larger or smaller squares later, but this size is manageable for learning the folds.
* **Single or Double-Sided:** As mentioned, single-sided paper is often preferred because the white side will end up on the inside of the folds, leaving a clean, vibrant green ribbon. However, double-sided colored paper or patterned paper can also yield beautiful results. If you’re using paper with a pattern, consider how the pattern will look when twisted – sometimes diagonal patterns or small, repeating motifs work particularly well.
The Foundation: Essential Base Folds
Before we start twisting, we need to establish a few key creases on our paper. These are standard folds you’ll encounter in many origami projects, and mastering them now will serve you well. Ensure you make all your creases sharp and precise by running your fingernail along them.
First, place your colored side down (if you’re using single-sided paper) on a flat surface.
1. **Diagonal Fold:** Take the bottom-right corner and bring it precisely to meet the top-left corner. Crease firmly along the diagonal line. Unfold the paper. You should have a single diagonal crease running across the square.
2. **Other Diagonal Fold:** Now, take the bottom-left corner and bring it precisely to meet the top-right corner. Crease firmly along this second diagonal line. Unfold the paper. You now have two diagonal creases forming an “X” on your paper.
3. **Horizontal Fold:** Flip the paper over so the colored side is now facing up. Take the bottom edge and bring it up to meet the top edge. Align the edges perfectly and crease firmly. Unfold.
4. **Vertical Fold:** Take the left edge and bring it over to meet the right edge. Align the edges and crease firmly. Unfold.
You should now have a grid of creases on your paper, with the two diagonal creases forming an “X” and the horizontal and vertical creases forming a “+”.
Your Step-by-Step Origami Ribbon Guide
Now, let’s bring our green paper to life! Keep your colored side facing up for this next part.
1. **Collapse into a Preliminary Base:** This is where things start to take shape! You’ll be using the creases you just made to form a smaller square. Gently push the left and right sides of the paper inwards along the horizontal crease. As you do this, the top edge will naturally want to fold down. Bring the top edge down to meet the bottom edge, and the side flaps will fold inwards. You should end up with a smaller square, with the flaps on the bottom and an open edge at the top. This is often called a preliminary base or waterbomb base, depending on the orientation of the folds. Ensure all layers are neatly aligned.
2. **Opening the Flaps:** Orient the square so the open edges are pointing towards you. You’ll see two flaps on the bottom. Take the top flap on the right side. Fold its bottom edge upwards to align with the center vertical crease. Make a sharp crease.
3. **Repeat on the Left:** Now take the top flap on the left side. Fold its bottom edge upwards to align with the center vertical crease. Make a sharp crease. Your paper should now resemble a kite shape on top.
4. **Folding the Top Point Down:** Take the very top point of the kite shape you just made and fold it downwards, so the tip touches the bottom edge of the folded flaps. Crease firmly.
5. **Unfold the Last Three Folds:** Carefully unfold the last three folds you just made (the two kite flaps and the top point). You’ll see the creases clearly.
6. **Petal Fold:** This is the most unique fold! Hold the paper so the open edge is pointing towards you. Gently lift the bottom point upwards. As you lift, use the creases you just made as guides. The sides will naturally want to fold inwards. You want to bring the bottom point all the way up to meet the top point. As you do this, the side flaps you folded up in step 2 and 3 will flatten out to the sides. This fold, when done correctly, will create a long, diamond-shaped flap. Press it down firmly. This is a petal fold.
7. **Flip and Repeat:** Flip the entire model over. You will see the other side, which currently looks like a plain square. Repeat steps 2 through 6 on this side. So, fold the bottom edge of the top flap on the right to the center, then the bottom edge of the top flap on the left to the center. Fold the top point down to the bottom edge. Unfold these three folds. Then, lift the bottom point upwards to meet the top point, allowing the sides to fold inwards, creating another petal fold.
8. **Forming the Ribbon:** You should now have a long, somewhat diamond-shaped piece with two flaps at the top and two at the bottom. Orient it so the long points are at the top and bottom. Take the top right flap and tuck its point into the pocket created by the petal fold on the opposite side. It should slide in smoothly.
9. **Tuck the Other Top Flap:** Now take the top left flap and tuck its point into the pocket on the opposite side.
10. **Tuck the Bottom Flaps:** Flip the model over. You’ll see two flaps at the bottom. Take the bottom right flap and tuck its point into the pocket on the opposite side.
11. **Final Tuck:** Finally, take the bottom left flap and tuck its point into the pocket on the opposite side.
12. **The Twist:** Now for the magical part! Hold the model firmly. Gently pull the two points at one end of the ribbon apart, and simultaneously push the two points at the other end together. You should see the ribbon start to twist. Continue to gently adjust and twist until you achieve a beautiful, even twist. Don’t be afraid to use a bit of gentle pressure.
Congratulations! You’ve just created a gorgeous twisted paper ribbon!
Common Pitfalls and How to Avoid Them
Don’t worry if your first attempt isn’t perfect; origami is a skill that improves with practice! Here are a couple of places beginners often stumble and how to get it right:
* **Messy Creases:** The most common issue is not making creases sharp and precise enough. This is especially crucial in step 1 (collapsing into the preliminary base) and during the petal fold. *How to avoid:* After making a fold, always run your fingernail or a bone folder firmly along the crease. This ensures the paper stays folded and helps subsequent folds align accurately. If your folds are soft, the paper won’t hold its shape well, and the tucking in steps will be frustrating.
* **Tucking Issues:** In steps 8 through 11, when you’re tucking the points into the pockets, you might find they don’t fit or keep popping out. *How to avoid:* Ensure that the previous folds, especially the petal fold, were executed cleanly. The petals should lie relatively flat. Also, make sure you’re tucking the very tip of the flap into the pocket. If the point is too blunt or the flap is too thick from soft folds, it won’t slide in easily. Sometimes, gently easing the pocket open with a fingernail can help. Don’t force it; if it’s resisting, check your previous folds.
* **Uneven Twist:** When you get to step 12, if the ribbon twists unevenly or doesn’t seem to hold its twist, it’s often because the previous tucking wasn’t done symmetrically. *How to avoid:* Ensure that each flap is tucked firmly and to the same depth on both sides. When you’re twisting, do it gently and symmetrically. Pull one end while pushing the other. If one side seems to be resisting more, ease up and try again.
Varying Your Twisted Ribbon
Once you’ve mastered the basic green ribbon, the possibilities for variation are endless!
* **Size:** Simply start with a different size square. A larger square will result in a longer, thicker ribbon, while a smaller square will create a delicate, miniature ribbon.
* **Paper Pattern:** Experiment with patterned origami paper! Papers with floral motifs, geometric designs, or even simple stripes can create stunningly different ribbons. Consider how the pattern will appear when twisted – sometimes a pattern that looks random from afar becomes more structured once twisted.
* **Color:** Obviously, you can use any color of origami paper you like! Try vibrant reds for Christmas, soft pastels for spring, or even bold, contrasting colors for a modern look. You can also use single-sided paper with a different color on the white side for a subtle two-tone effect if you leave parts of the white showing.
Displaying and Gifting Your Creations
The twisted paper ribbon is incredibly versatile for display and gifting.
* **Gift Topper:** This is my favorite use! Instead of a traditional bow, tie or glue your twisted ribbon onto the top of a gift box. It adds a handmade, personal touch that recipients always appreciate.
* **Garlands and Bunting:** Make several ribbons in various colors or patterns and string them together to create a beautiful garland for parties or room decoration.
* **Scrapbooking and Card Making:** These ribbons can add a lovely dimensional element to handmade cards or scrapbook pages.
* **Table Decorations:** Arrange a few ribbons on a serving platter or as part of a centerpiece for a special occasion.
* **Party Favors:** Attach a small twisted ribbon to a party favor bag as an elegant finishing touch.
I hope you’ve enjoyed making this twisted paper ribbon as much as I do! It’s a simple yet effective origami model that offers a lot of creative freedom. Happy folding!
Conclusion
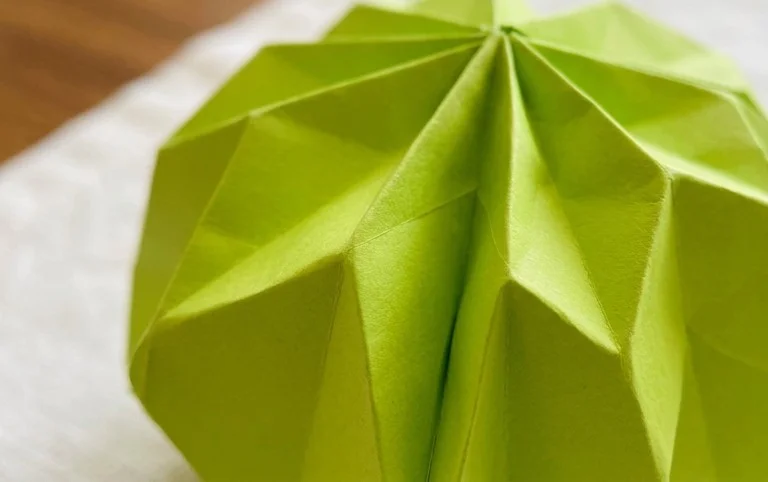
Congratulations on folding your very own twisted paper ribbon! We hope you enjoyed this fun and relatively simple origami project. Don’t worry if your first attempt isn’t perfect; every fold is a learning experience, and practice truly makes perfect with these intricate designs. We’d love to see your beautiful green twisted paper ribbon creations, so feel free to share them with us! For your next adventure, why not try this model in a vibrant red for a festive look, or perhaps a shimmering gold for added elegance? There are so many possibilities waiting to be explored. We invite you to delve deeper into the wonderful world of paper crafts and discover even more delightful projects to fold!
